
When Nathan and I debuted our Steampunk Pirate costumes last year, we neglected to take photos of the gun-embellisment process. This was poor planning, as people were pretty curious about how we pulled them together! So when I got a commission to make a custom designed steampunk pirate costume for a client, I made sure to take plenty of photos of the process this time!

My client and I explored several different base options. Although you can find plenty of very inexpensive water pistols around, we both really liked the Han Solo replica. It was $16, but very sturdy and proved to be an excellent starting platform for a steampunk gun.

I attempted to cheat and apply the base coat before sanding. It didn't work. So I took some find sandpaper and ran it over all the surfaces. Much better results!

Using regular painting acrylics, I applied a coat of black paint to the entire gun, except for the very front nozzle which I left orange for safety reasons.

Although none of the black would ultimately make it through to the top layer, it was a lot easier to visualize the different section colors when working over a single color palate. Also, if any color was going to show through, black was by far the best.

Here you can see I've applied the very first coat of the flat colors to most of the components!

One interesting feature of this gun was that it is not symmetrical - the sides are very different. This added a lot of interest and made it feel more realistic - and more steampunk, since asymmetry is a common feature of steampunk designs.

After applying two layers of the flat colors, it was time to add some shine and dimension! My husband let me raid his stash of high quality miniature paints. These are fairly expensive, so it was important that I have the flat colors underneath so I could get away with applying just one topcoat of the expensive stuff.

One color he didn't have was bronze, but I achieved the shade I wanted by mixing a dab of red and brown in with gold.

Gorgeous bronze!

Here I've applied the metallics to all of the bronze sections!

A close-up so you can see the difference between the flat colors and the metallic layer.

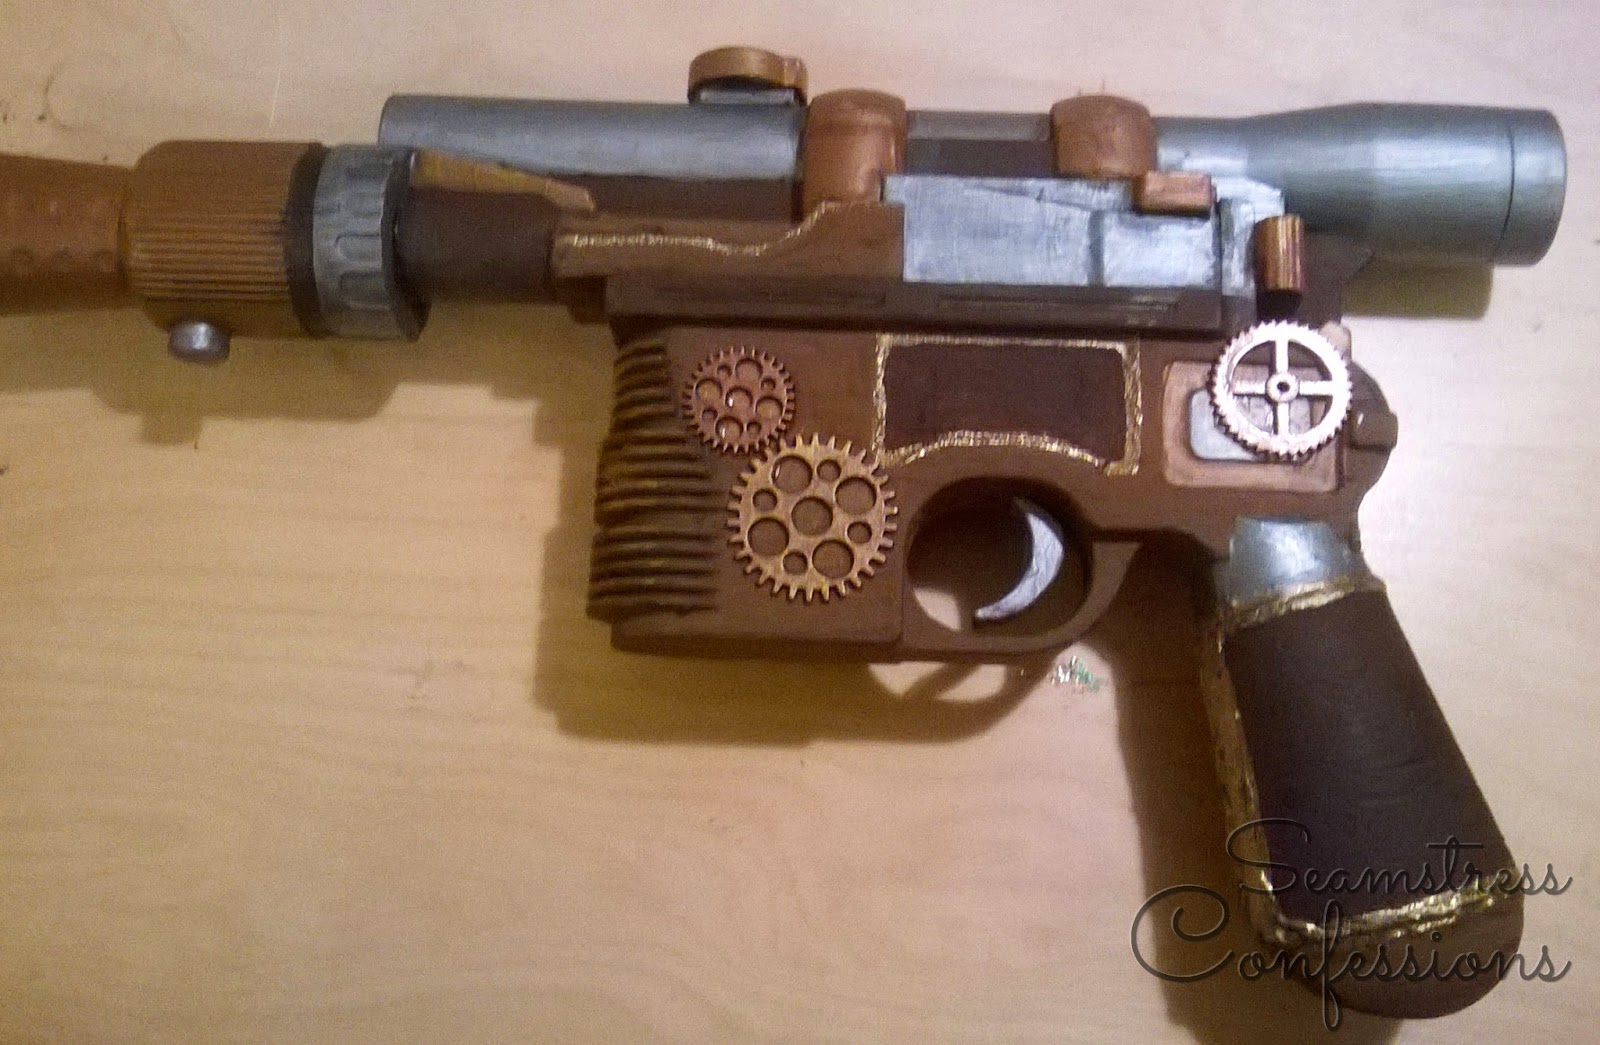
SO cool to see all of the metalics in place! I also used a brown wash to weather the gun.

Embellishment time! I placed little gears all over, added fake leather to the handle, and applied some metallic embossing powder around the edges of the pleather. Everything was secured with tacky glue.

Almost done...
As you can see, I played around with adding some purple and my client's initials. In the end, it was just too busy and didn't look good so I painted over them.


The embossing powder (melted by my heat gun) left some glittery specks on the gun that I painted over. This left the pleather looking rather dull. Thankfully I could restore the shine easily in the final step - the varnish.

I applied a satin varnish with a sponge. Here you can see it drying...

And it is DONE!

It's really crazy how much work went into it, but I am tremendously happy with the results!


No comments:
Post a Comment